Authentication and credentials
Initial setup: create the account in Koncili, create the application in Bling (in the Extensions Center) and connect both ends via OAuth. Done once per customer.
Create the Bling ERP account in Koncili
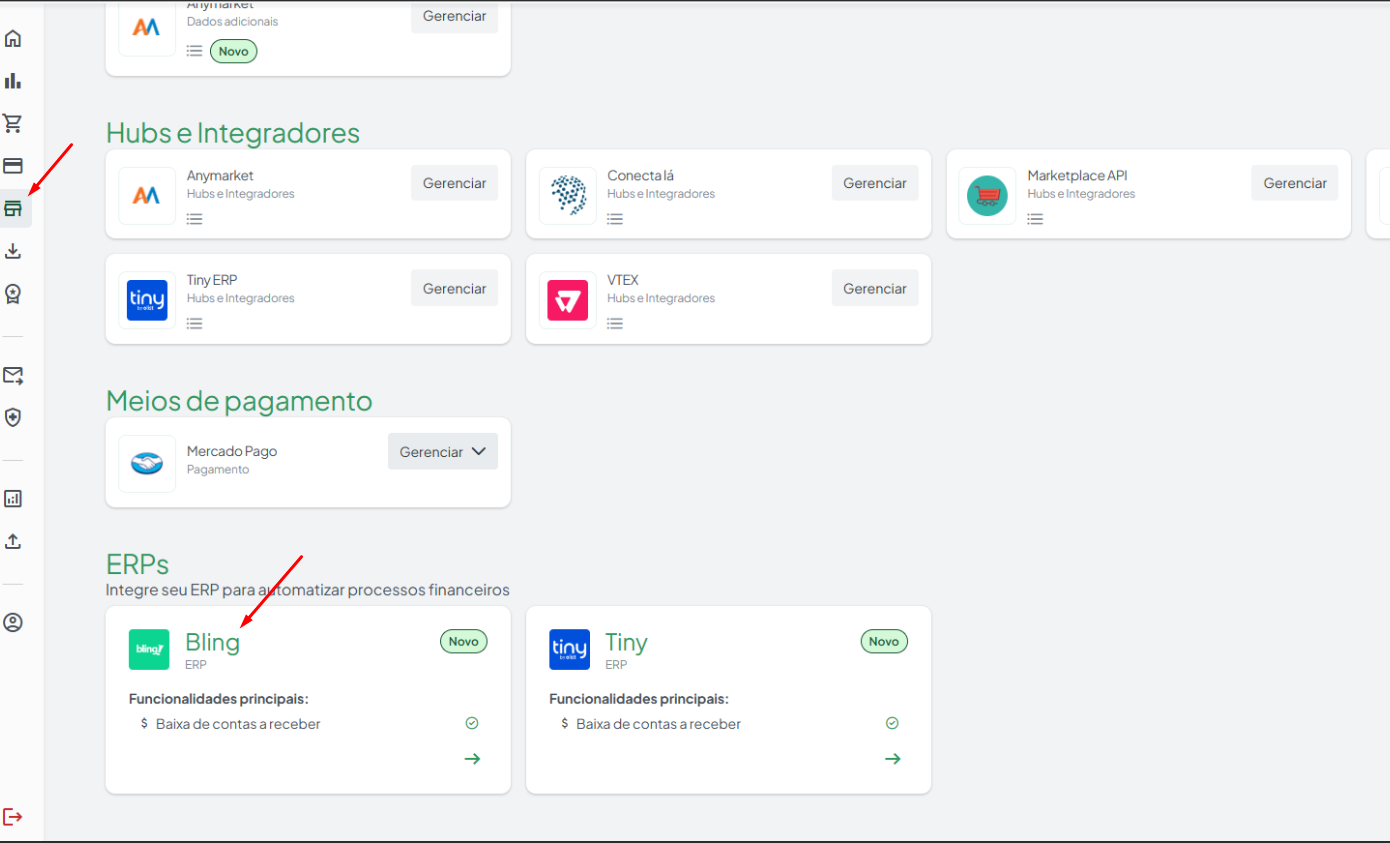
In Koncili, go to Integrations in the side menu and choose the Bling card.
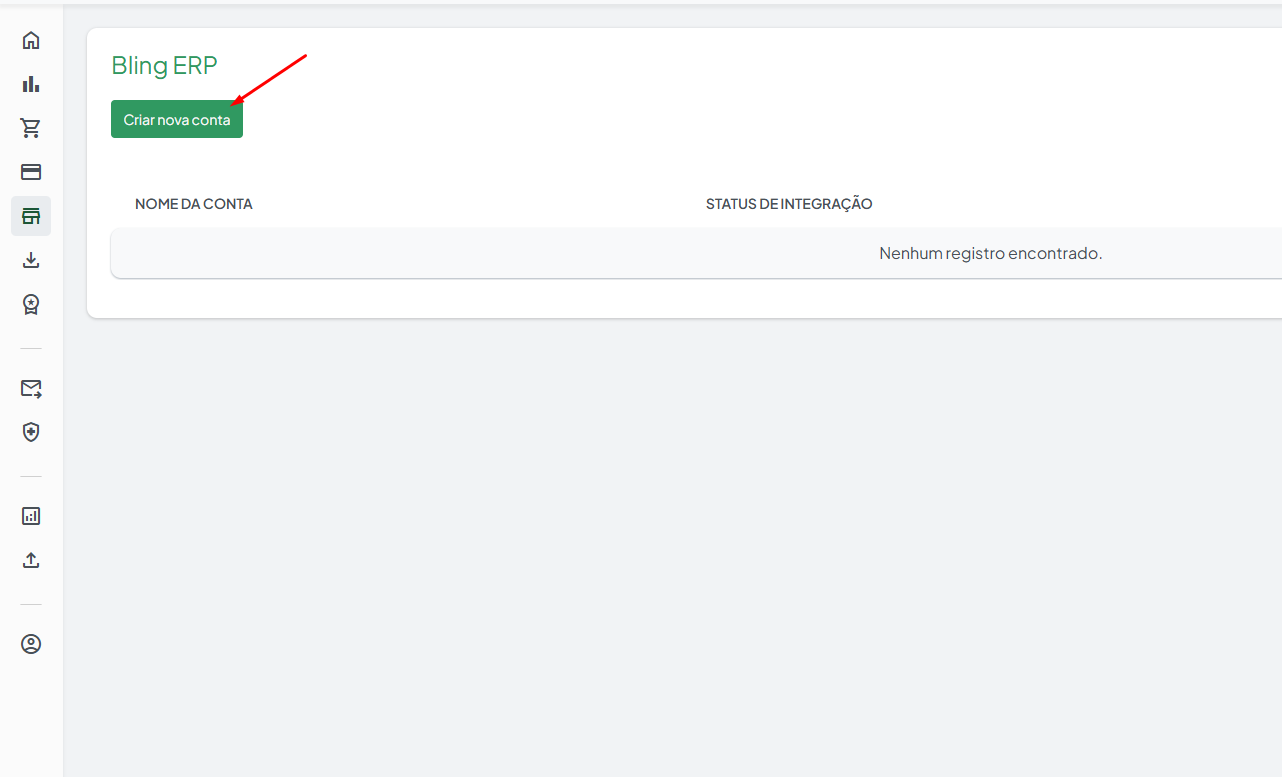
Click Create new account.
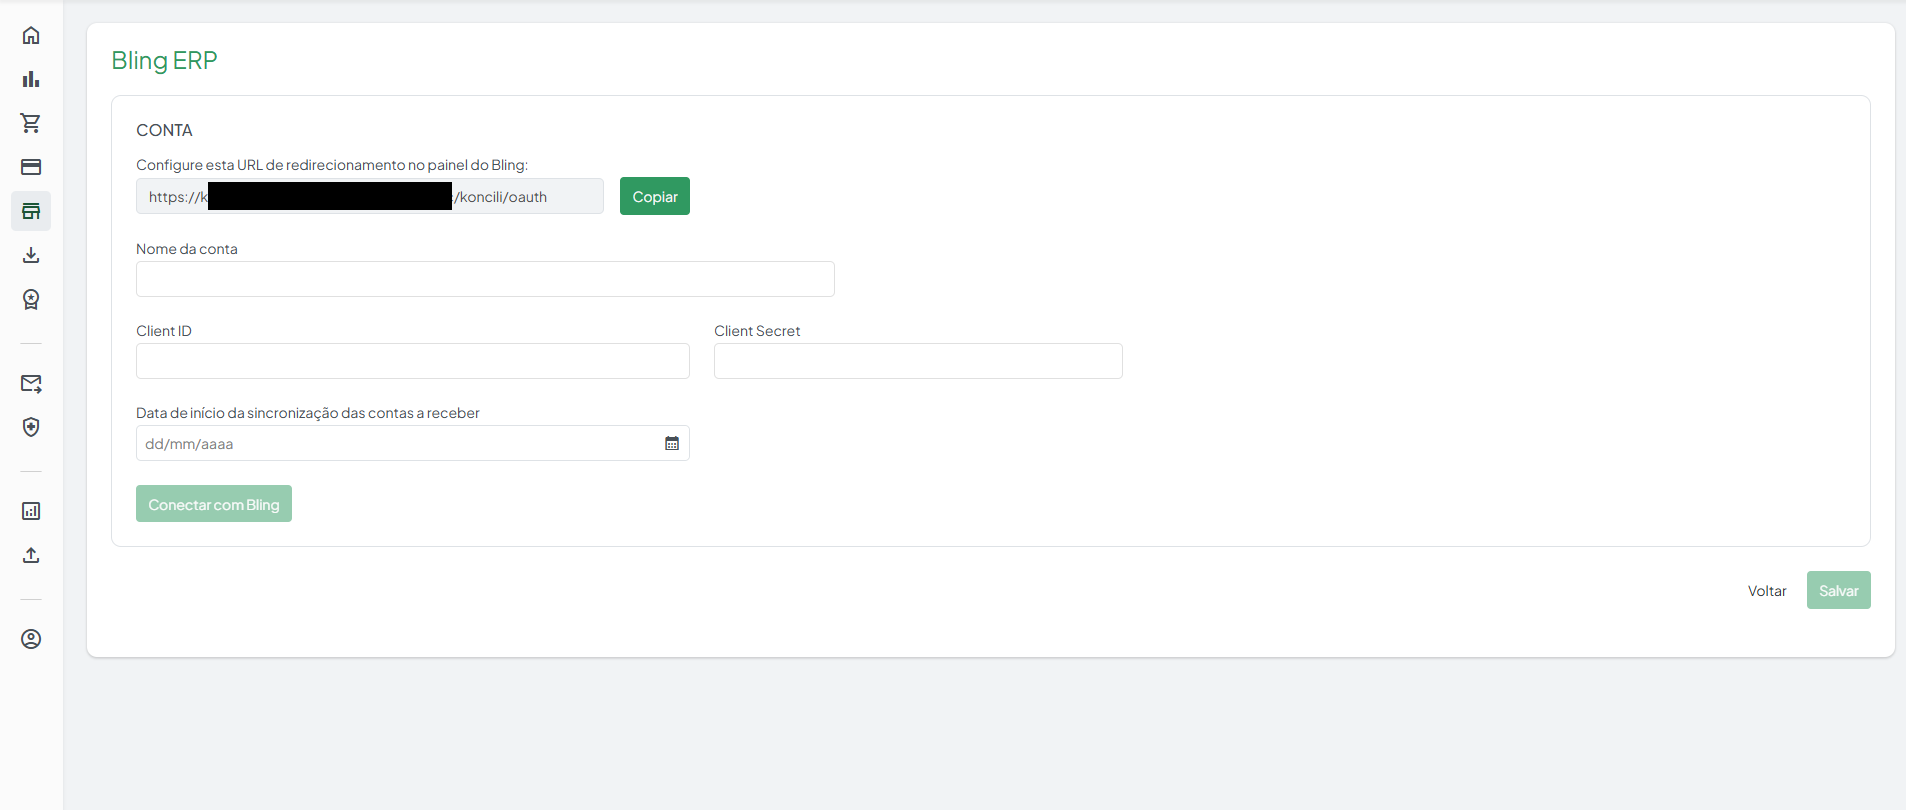
On the creation screen, copy the redirect URL shown (read-only, Copy button) — this link will be pasted into the Bling app registration (Step 6).
Open the Bling Extensions Center
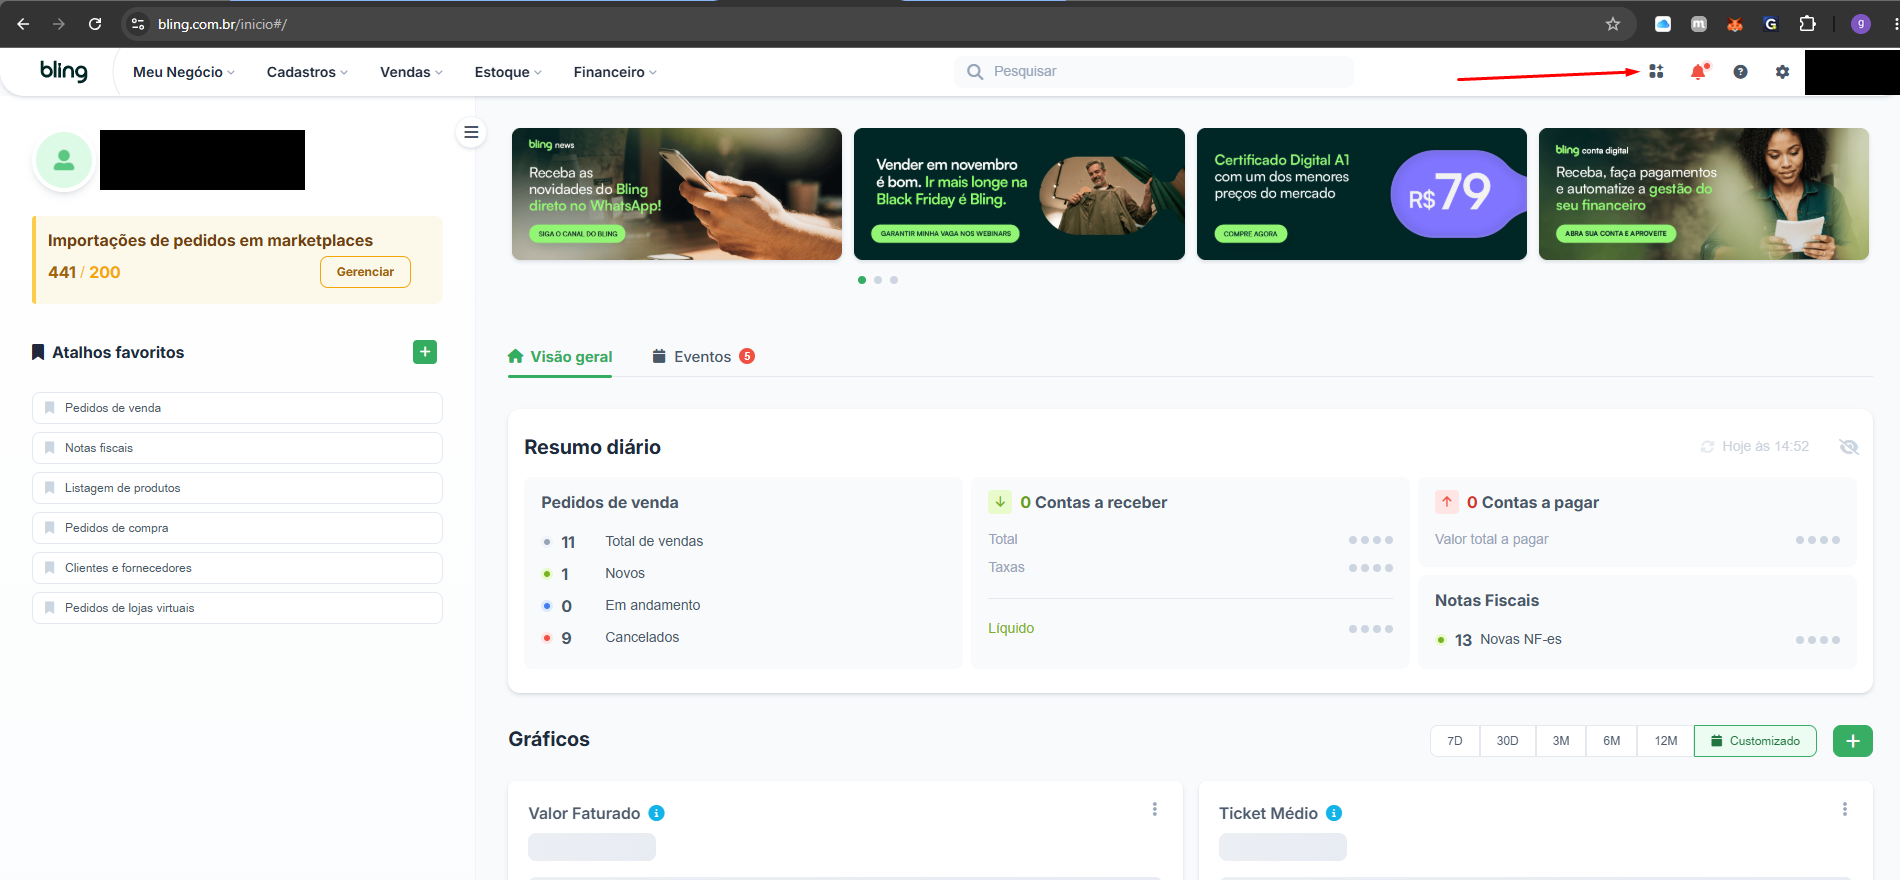
In Bling, click the grid icon (⊞) in the top-right corner of the header, next to the notifications bell — it opens the Extensions Center.
Go to the Integrator Area
In the Extensions Center, on the Discover tab, click Integrator Area, in the top-right corner of the screen.
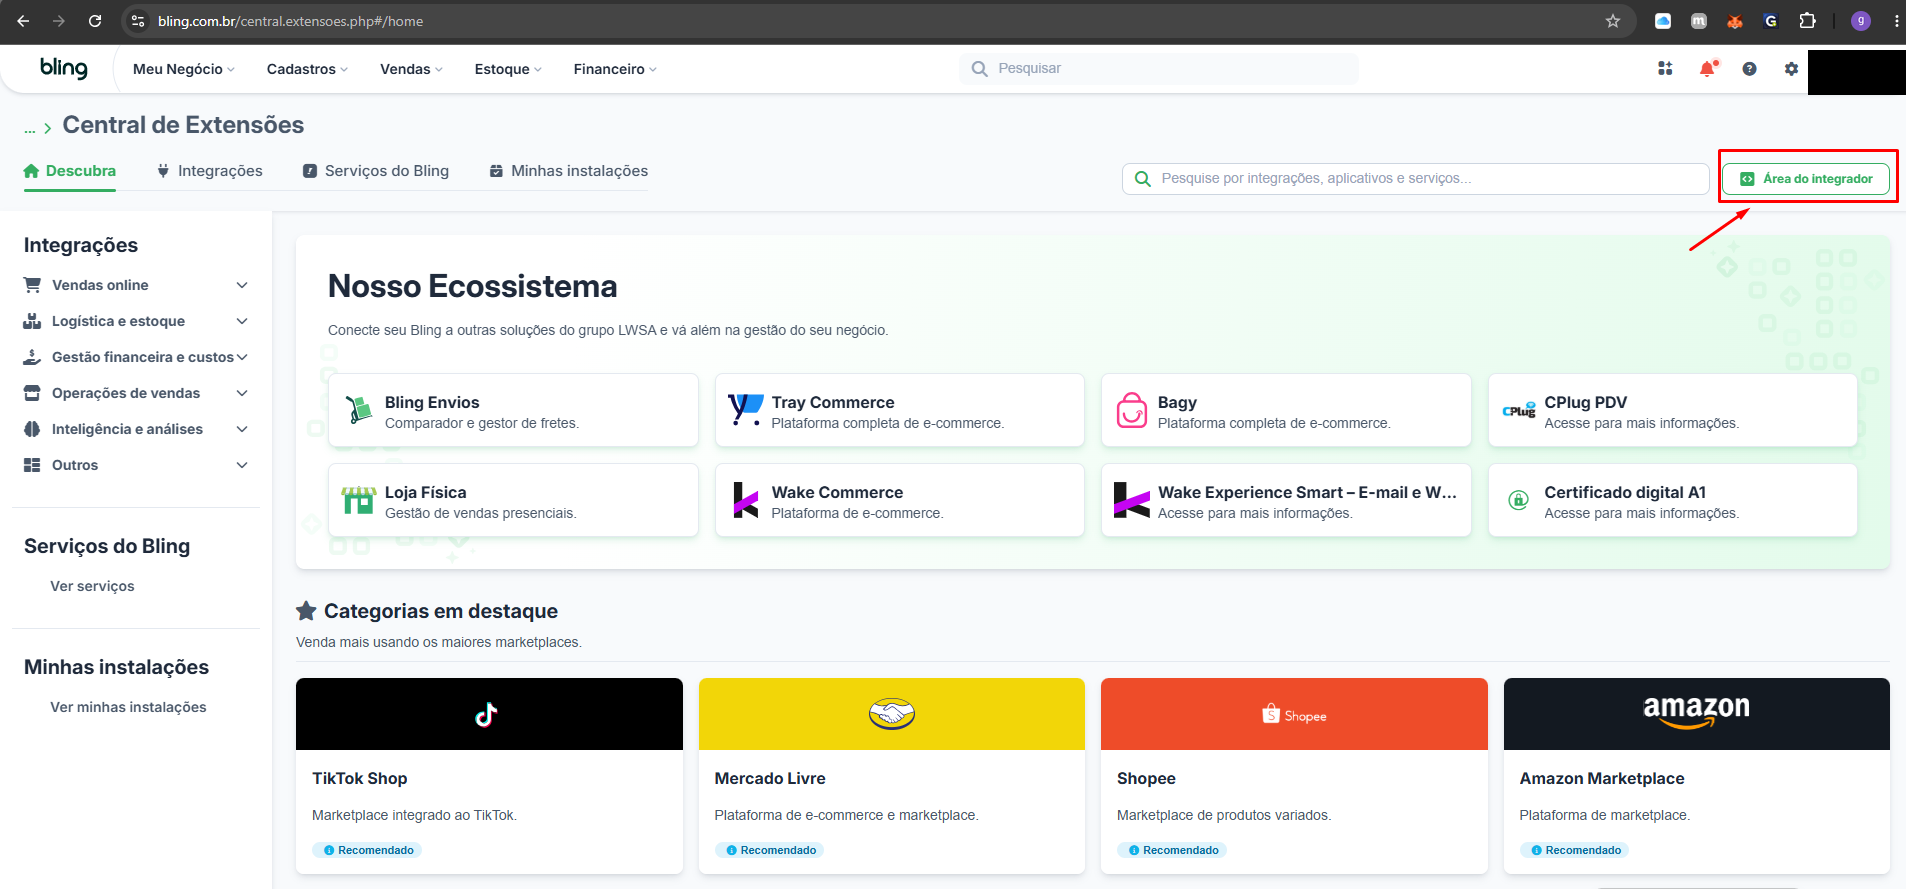
Create the application
In the Integrator Area, under Application registration, click + Create application.
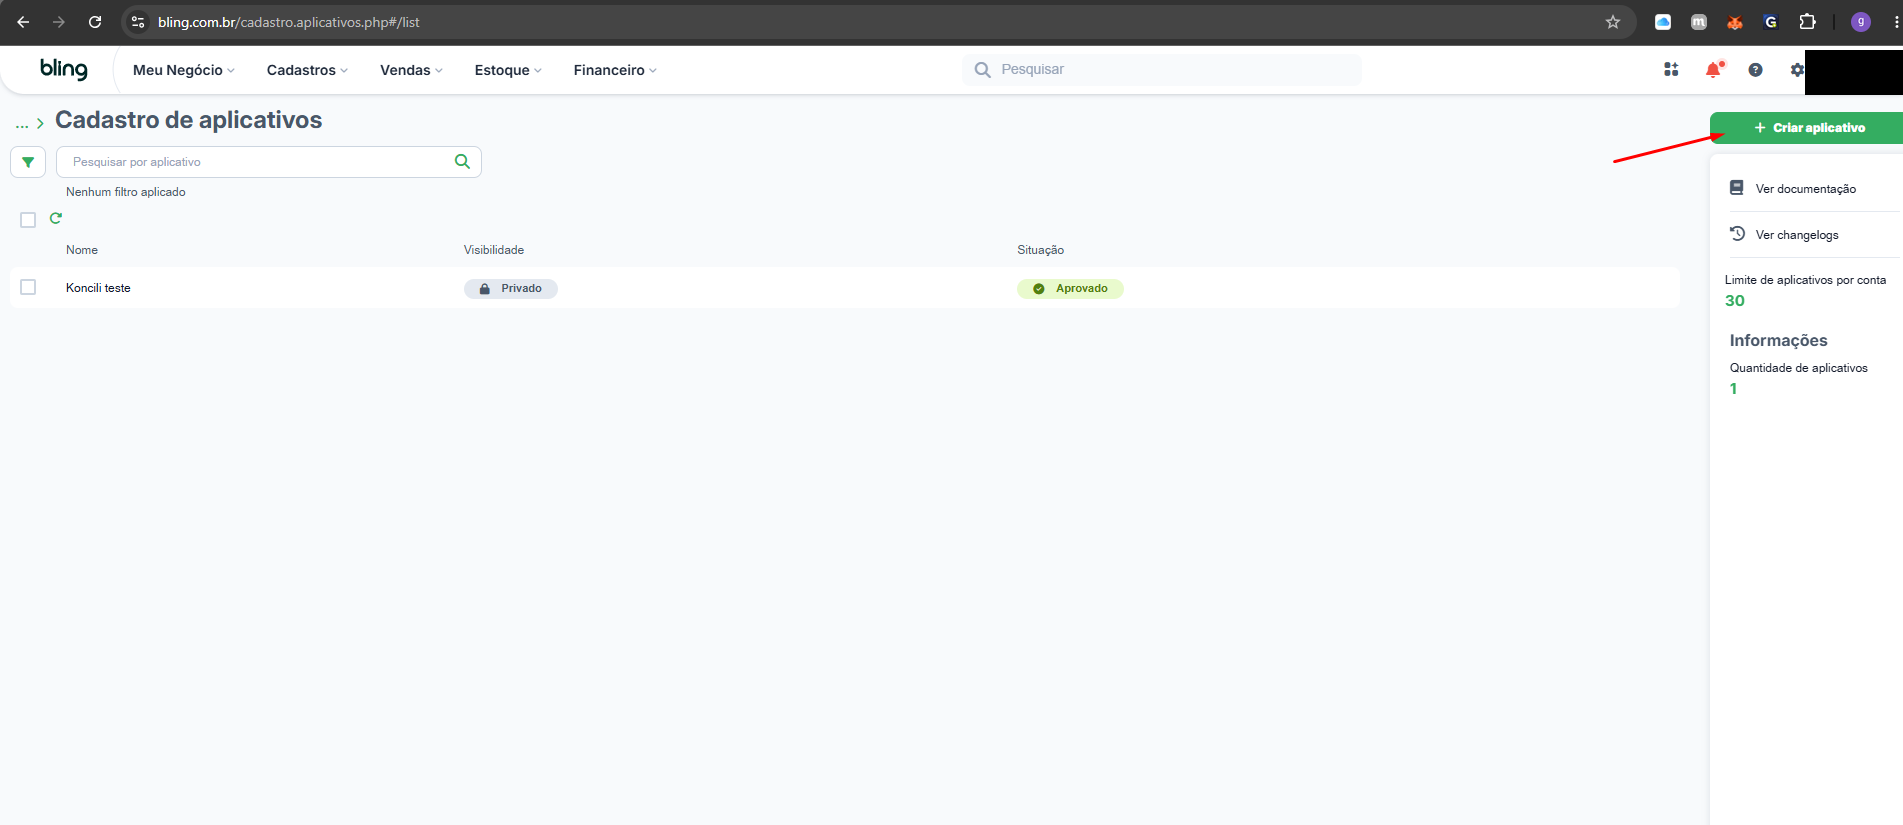
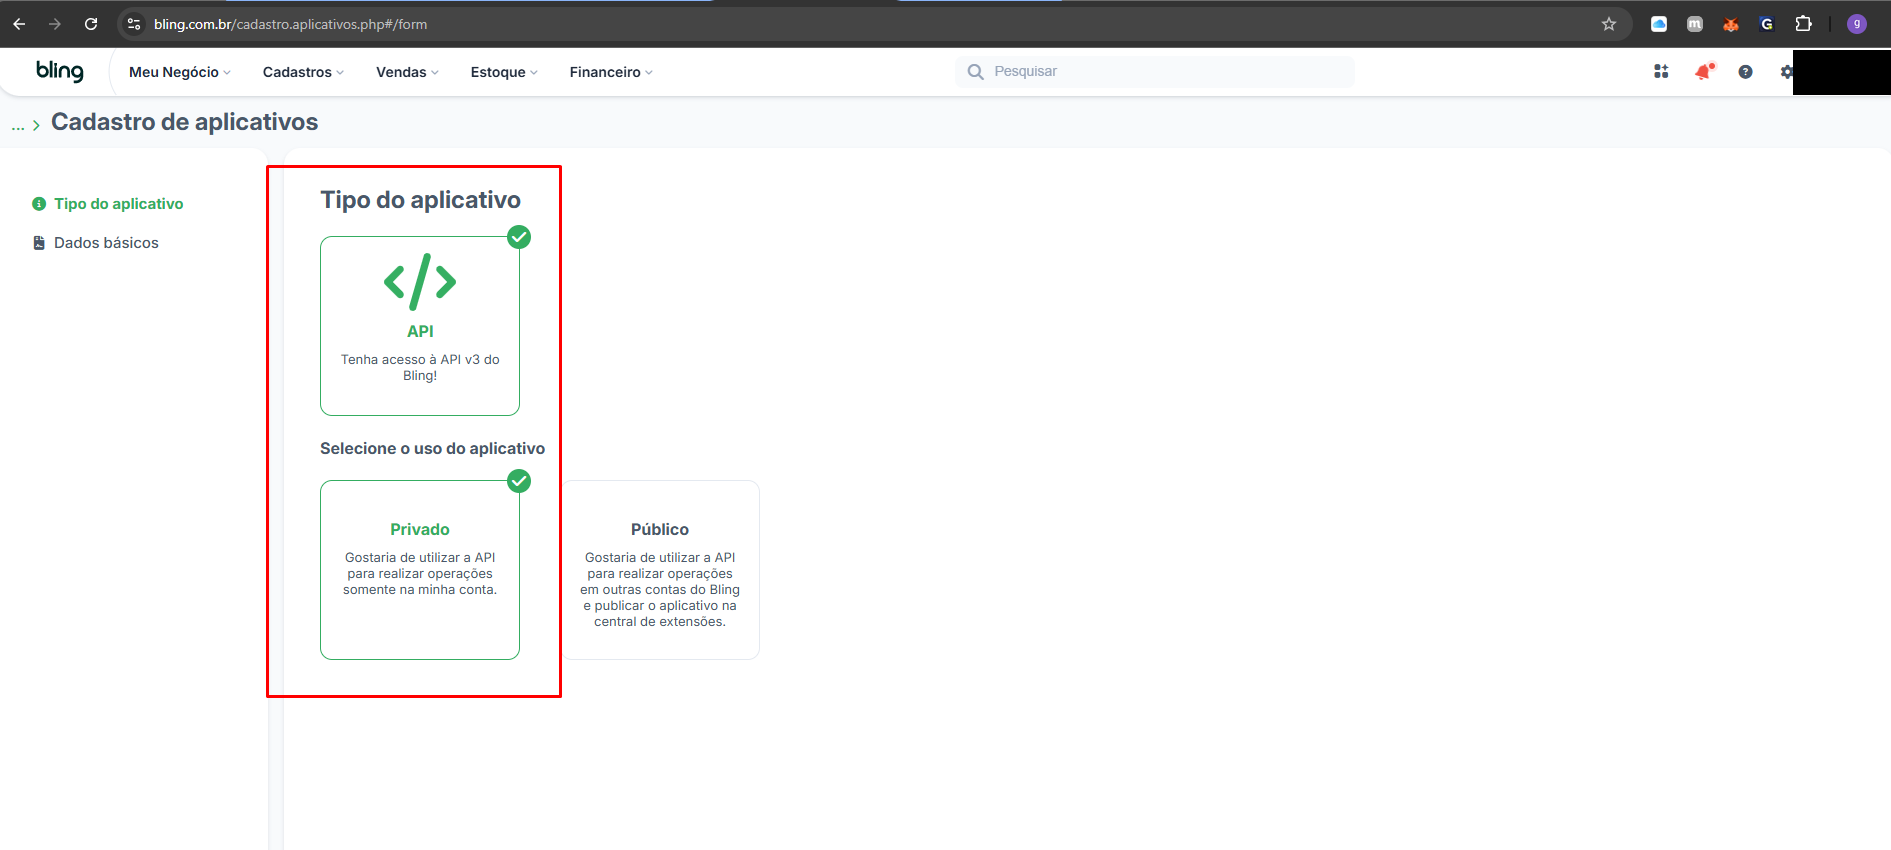
Choose the application type
Select the API type ("Get access to Bling's API v3!") and, under Select the application usage, choose Private — to use the API only in the customer's own account.
The Public type (operating on third-party accounts and publishing to the Extensions Center) does not apply to this integration.
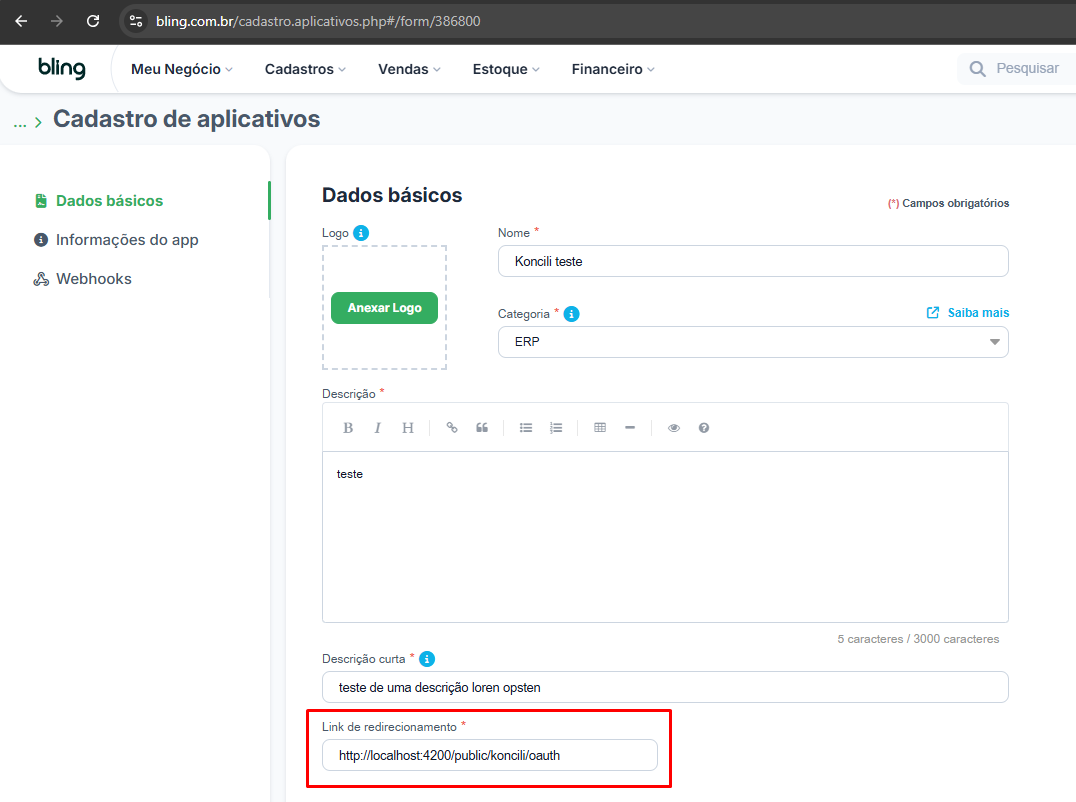
Fill in basic data, redirect and scopes
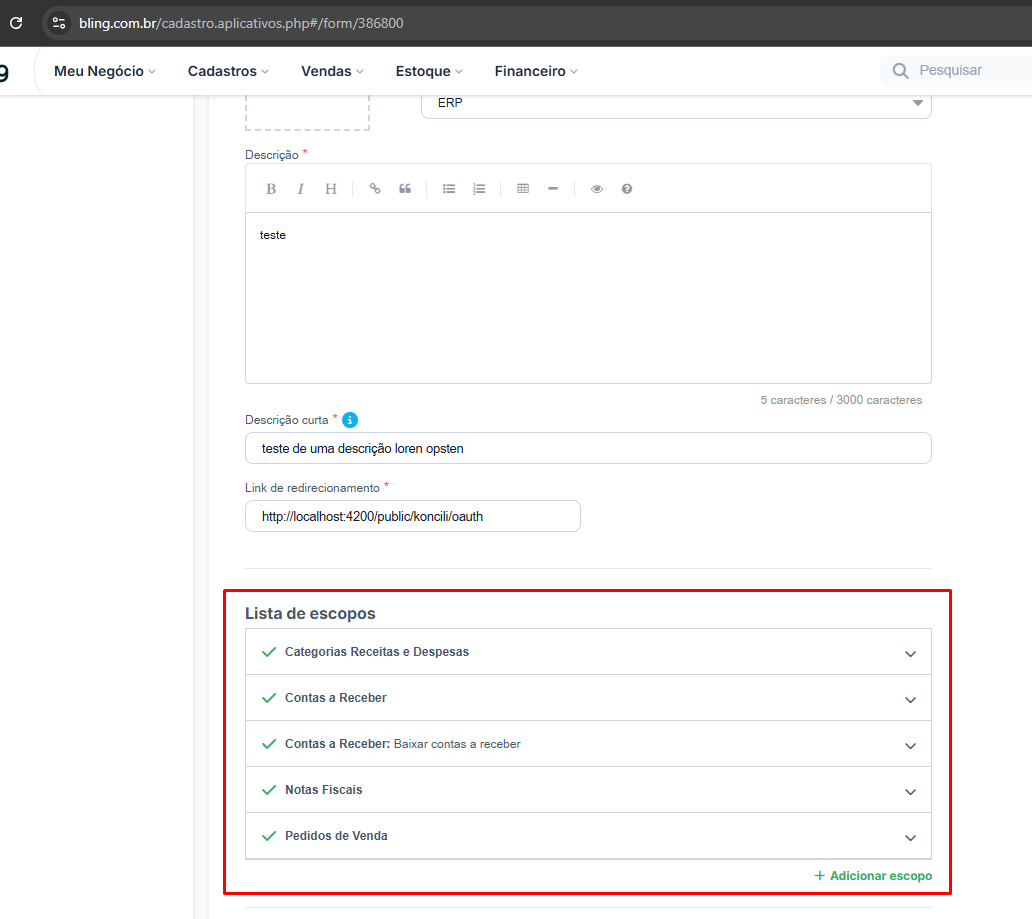
Under Basic data, fill in name, category (ERP), description and short description. In the Redirect link field, paste the URL copied in Step 1.
Under Scope list, add the permissions the integration uses:
- Categories — Income and Expenses
- Accounts Receivable
- Accounts Receivable: Write off accounts receivable
- Invoices (NF-e)
- Sales Orders
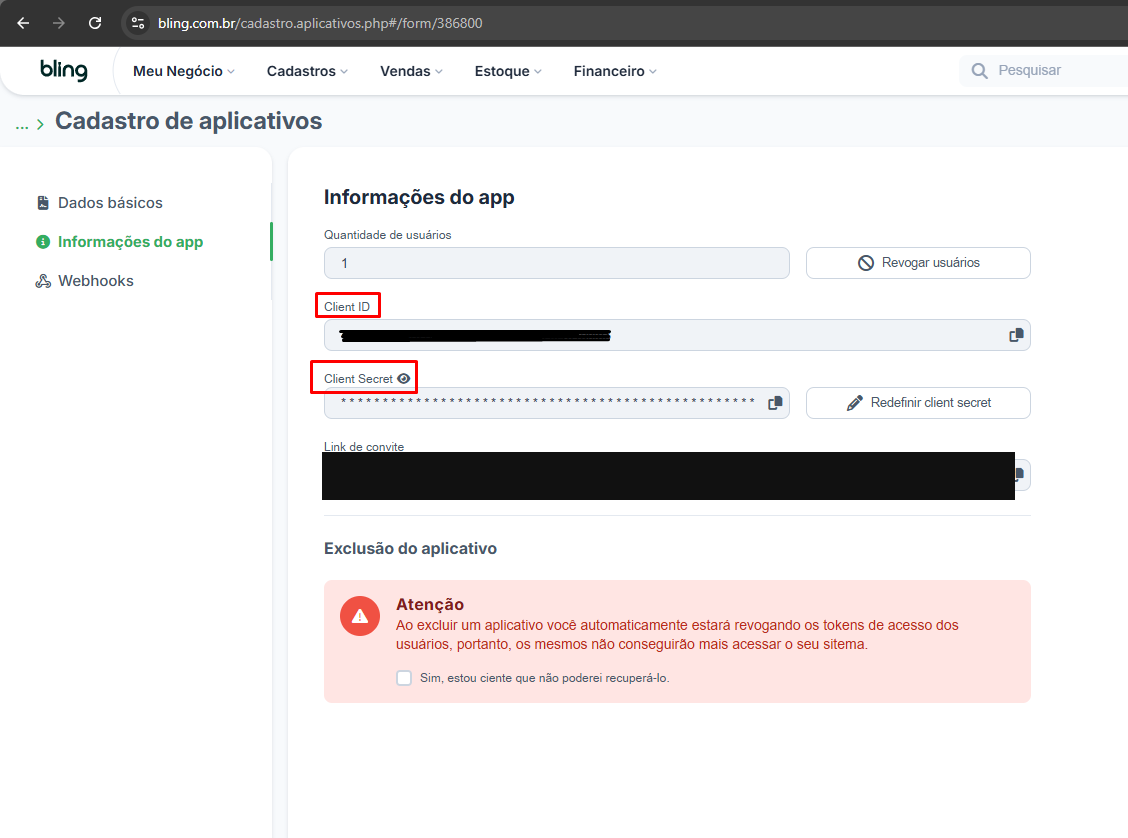
Copy the Client ID and Client Secret
Once saved, Bling generates the Client ID and Client Secret on the App information tab. Copy both values (copy icon next to each field) — they will be pasted into Koncili in the next step.
Connect the account in Koncili
Go back to the account creation screen in Koncili. Paste the Client ID and Client Secret into the matching fields (both required on creation; the secret is optional to resend in a future edit) and name the account.
Also fill in the Accounts receivable sync start date — the date from which Koncili starts fetching the receivables in Bling (at most 1 year back and not editable afterwards; see Important limitations).
Click Connect with Bling to open the OAuth authorization and, after completing authentication, click Save.