Tracking and validation
Steps 6, 7 and 8: how the team actually triggers and validates the write-off, once the account is connected and configured.
Send the write-off to Bling
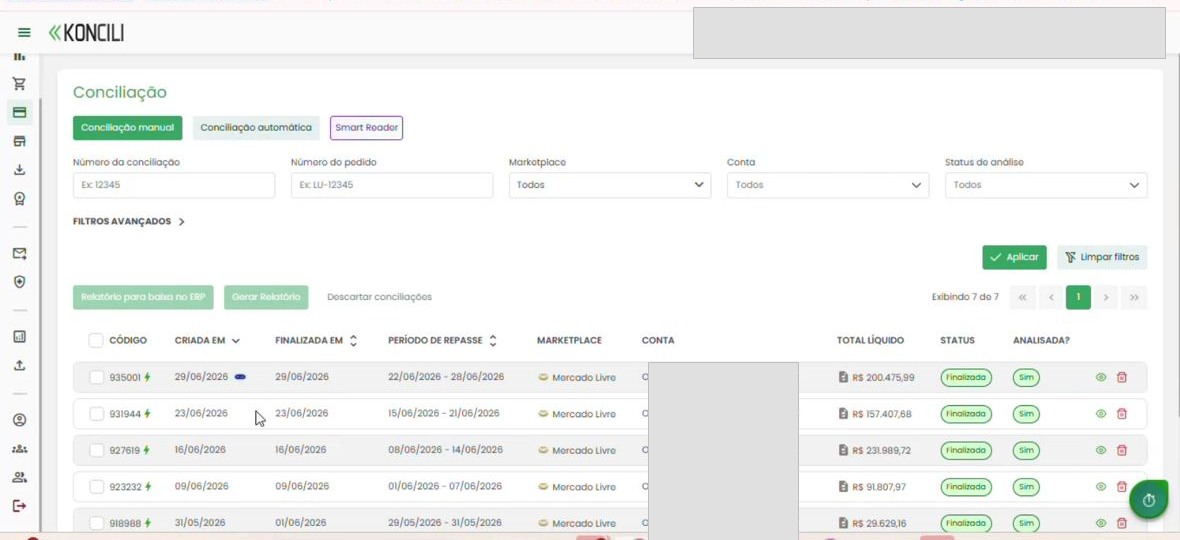
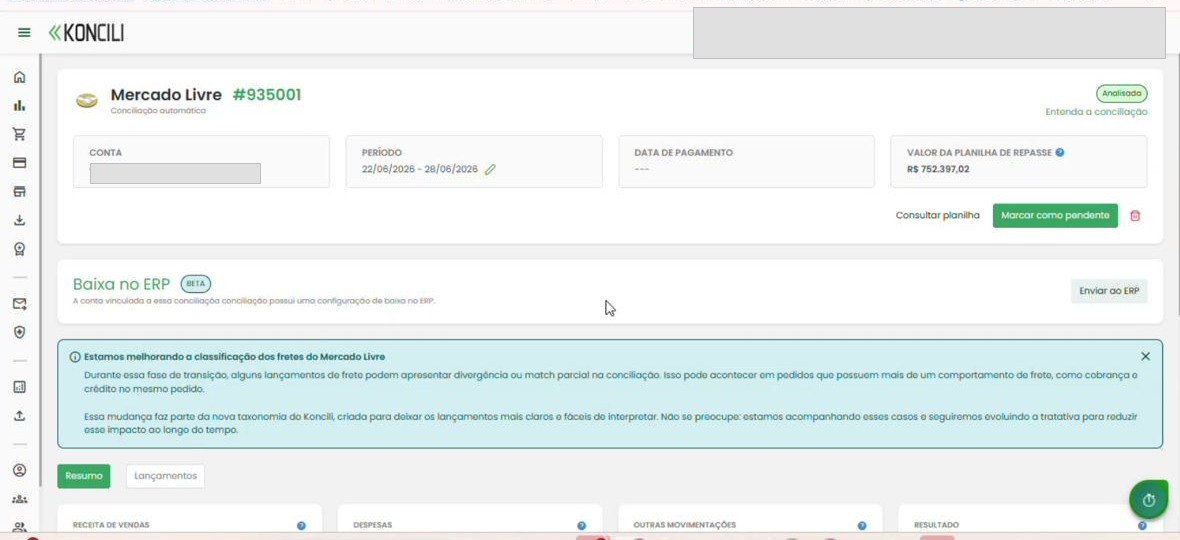
On the Reconciliation screen, open the desired reconciliation. If the account is configured, the Write-off in ERP section appears with the Send to ERP button.
On click, Koncili generates the export of the reconciliation entries and tries to write off each item in Bling, respecting the account's limit of 3 requests per second.
After sending, the button is disabled to prevent sending the same reconciliation twice.
Track it in Smart Report
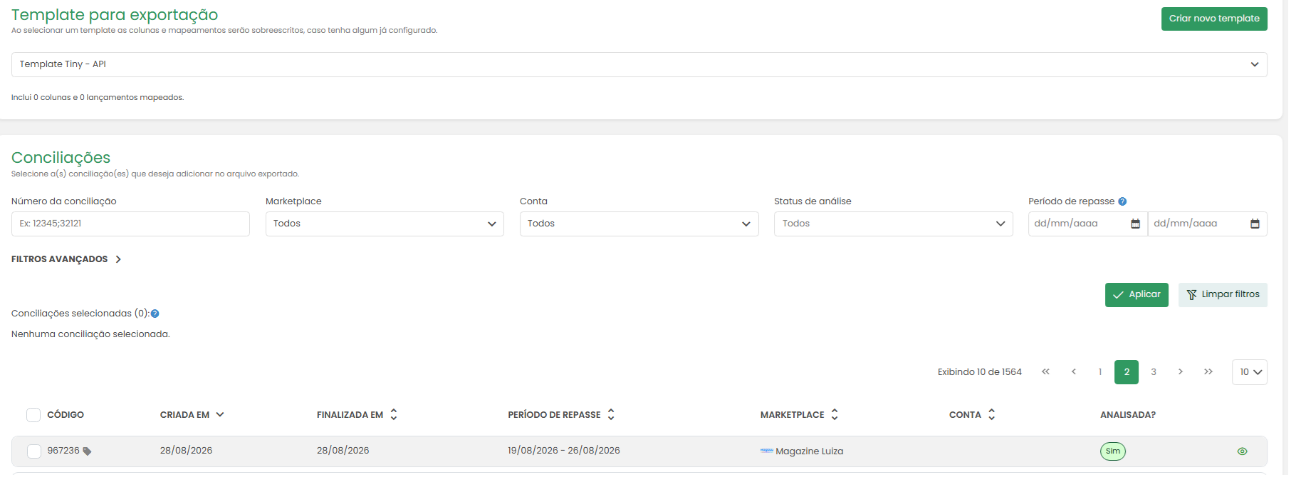
In Smart Report, select the same template used in the write-off configuration (Step 10). That way you see exactly the values sent to Bling.
If you prefer to use another template, you must ensure the column mapping is set up the same way — only then do the displayed results remain equivalent to what was sent.
In the reconciliation list, the tag icon next to the code indicates when the reconciliation has already been sent to the ERP.
Validate the status in the data extraction
When extracting the report, check the Show integration data? option.
With it, the file includes per order: whether it was written off, the write-off date and time, the execution status and the execution details — letting you validate what was processed for the ERP.
In the accounts receivable import, the Origin column shows Manual or Automatic — in Bling, the link always comes from the automatic job (no file).
Extrair dados
Se a opção for selecionada, os valores das colunas customizadas serão sempre positivas.
Se marcado, os pedidos cancelados da(s) conciliação(ões) selecionada(s) não serão listados no relatório.
Adiciona ao relatório, por pedido: se foi baixado, data e hora da baixa e status da integração com o ERP.