Authentication and credentials

Initial setup: create the account in Koncili, create the application in Olist/Tiny and connect both ends via OAuth. Done once per customer.

Step 1

Create the Olist/Tiny ERP account in Koncili

In Koncili, go to Integrations and choose ERP > Olist/Tiny. Click Create new account.

On the creation screen, copy the redirect URL shown in the form. This link will be used when registering the application in Olist/Tiny.
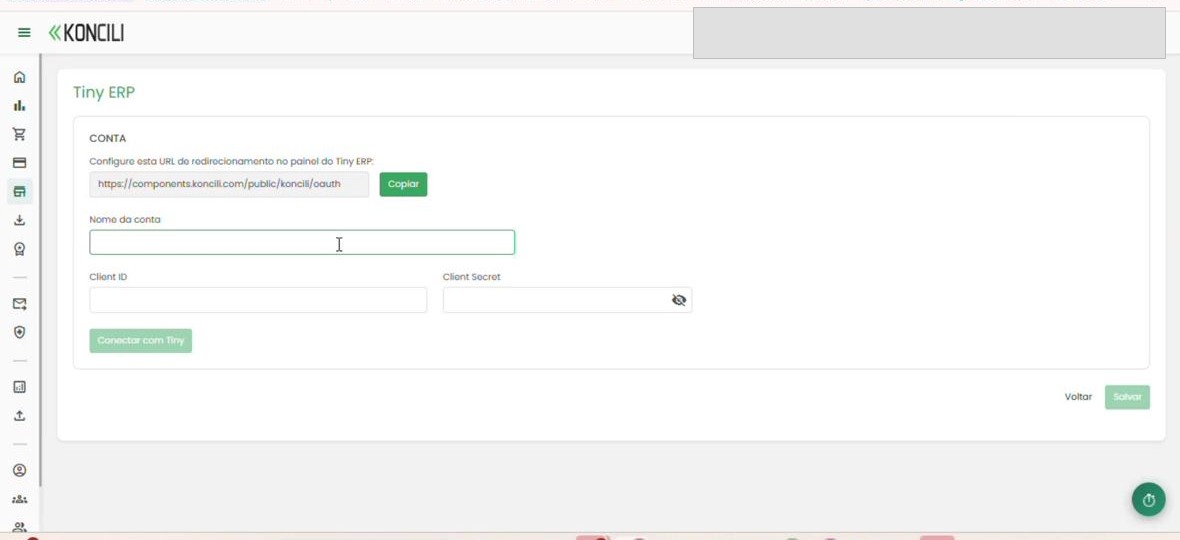
Olist/Tiny ERP screen in Koncili with redirect URL and Copy button
Olist/Tiny ERP account creation screen in Koncili — copy the redirect URL.
Step 2

Create the application inside Olist/Tiny

In Olist/Tiny, go to Settings > General preferences > Other settings > Applications and click + new application.
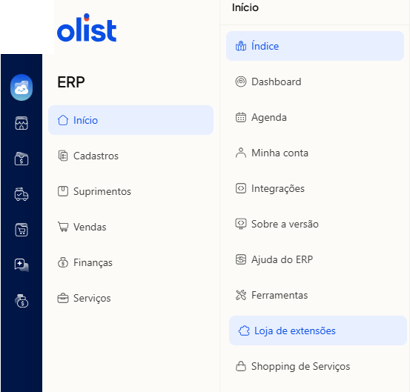
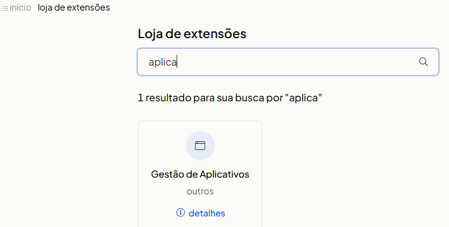
"Applications" not showing? Go to Home > Extensions store, search for Applications and install Gestão de Aplicativos (Application Management).
Olist/Tiny menu at Home > Extensions store
Extensions store searching for Applications — Gestão de Aplicativos result
olistERP
Alterar dados do usuário
Cadastro de usuários do sistema
Configurações do servidor de e-mail
Configurações das etiquetas
Configurações da agenda
Outras configurações
Interface do usuário
Central de notificações
Aplicativos ←
Token API
Configurações de API
Illustration based on the submitted screenshot — Olist/Tiny > Settings > General preferences > Other settings > Applications.

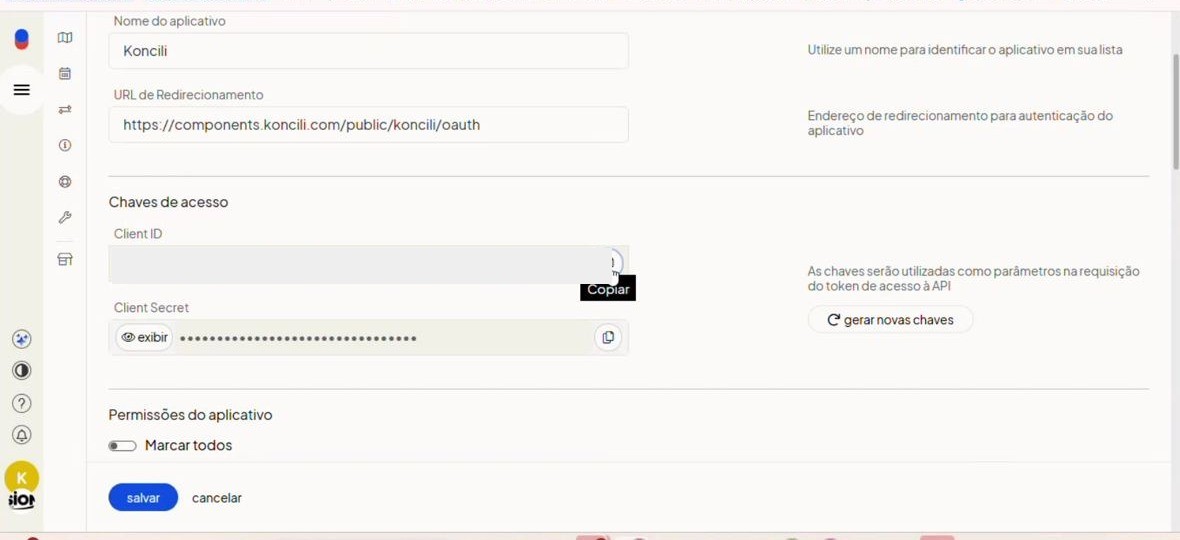
Set a name for the app (e.g. Koncili) and paste the URL copied in step 1 into the redirect field.

On save, Olist/Tiny generates the Client ID and the Client Secret. Copy both values to use in Koncili.

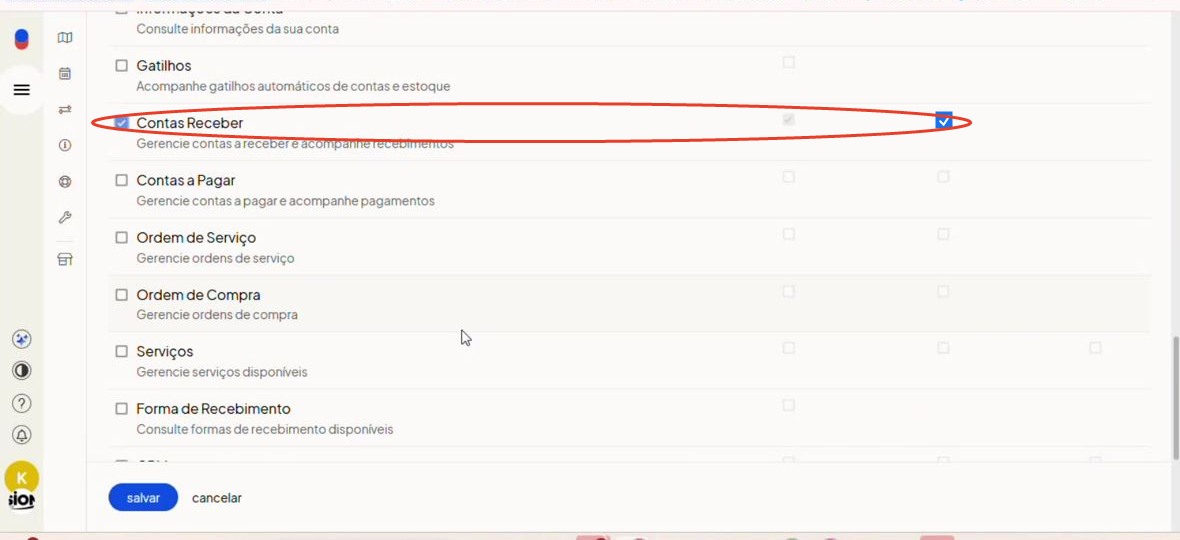
Enable the required permissions, at least Accounts Receivable.
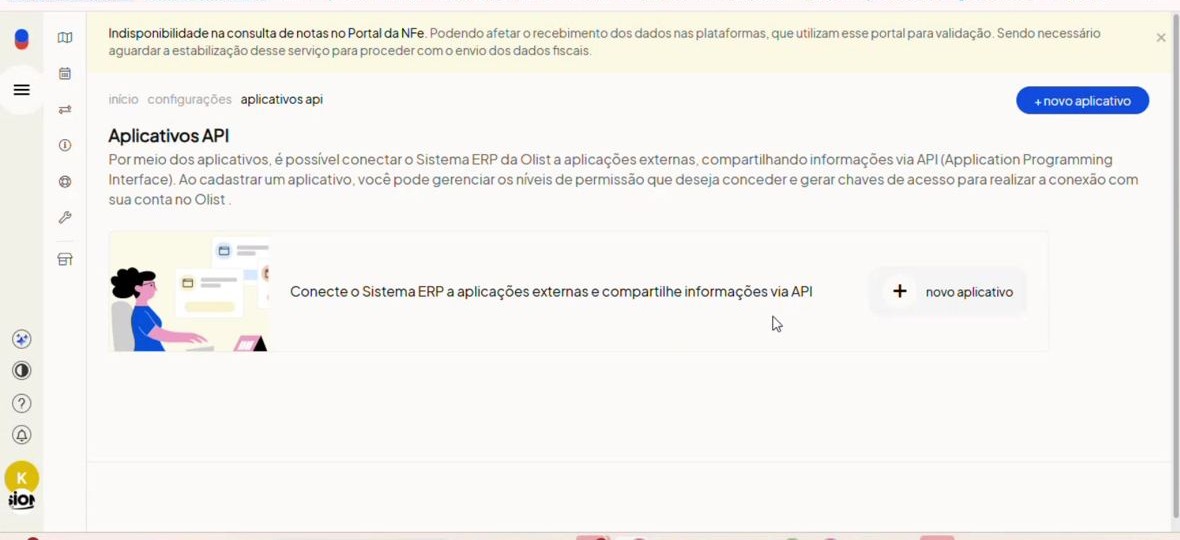
Olist/Tiny API Applications screen with + new application button
Olist/Tiny > Settings > Applications — click "+ new application".
Olist/Tiny screen with generated Client ID and Client Secret
Client ID and Client Secret generated by Olist/Tiny after saving the application.
Application permission list including Accounts Receivable
Enable the application permissions — include at least "Accounts Receivable".
Step 3

Connect the account in Koncili

Go back to the account creation screen in Koncili. Fill in the account name, Client ID and Client Secret.

Click Connect with Olist/Tiny to open the OAuth authorization and, after completing authentication, click Save.

When you click Connect with Tiny, if you are not logged into Olist/Tiny, the login screen opens — the user you enter must be the same one used to connect to the system.

Company with more than one CNPJ in Olist/Tiny: create the credentials for each CNPJ using the username and password that connect to that CNPJ. E.g. comercial@cliente.com.br connects to CNPJ 11.111.111/0001-11 and comercial@11.111.111/0002 connects to the CNPJ ending 0002. Each connection must be created with the correct login — both in Olist/Tiny and when entering the username and password on the Koncili screen.
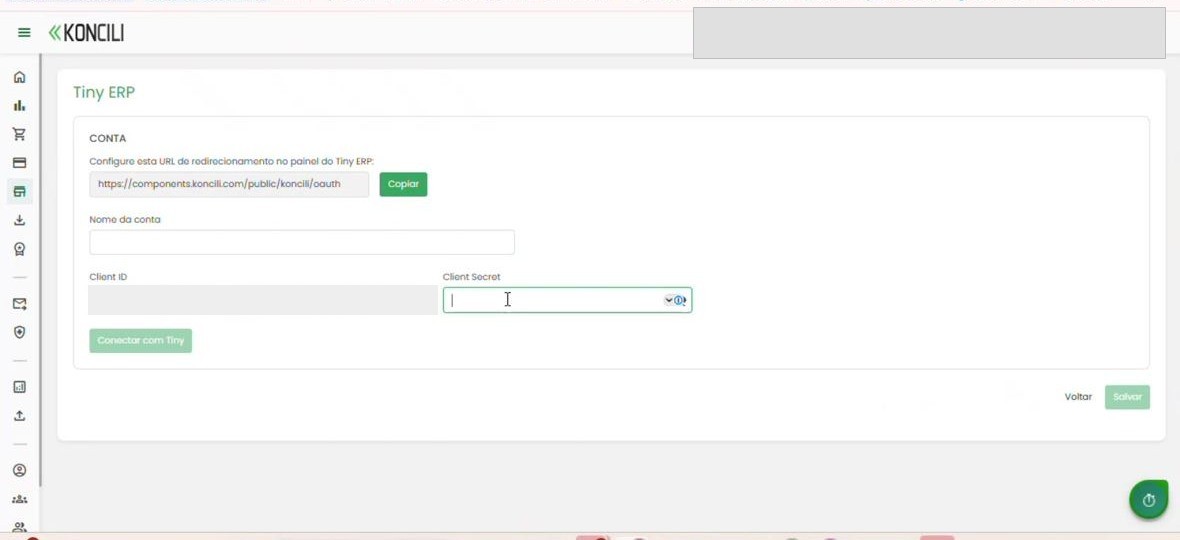
Koncili screen with Client ID and Client Secret filled in and Connect with Olist/Tiny button
Paste Client ID/Secret, name the account and click "Connect with Olist/Tiny".
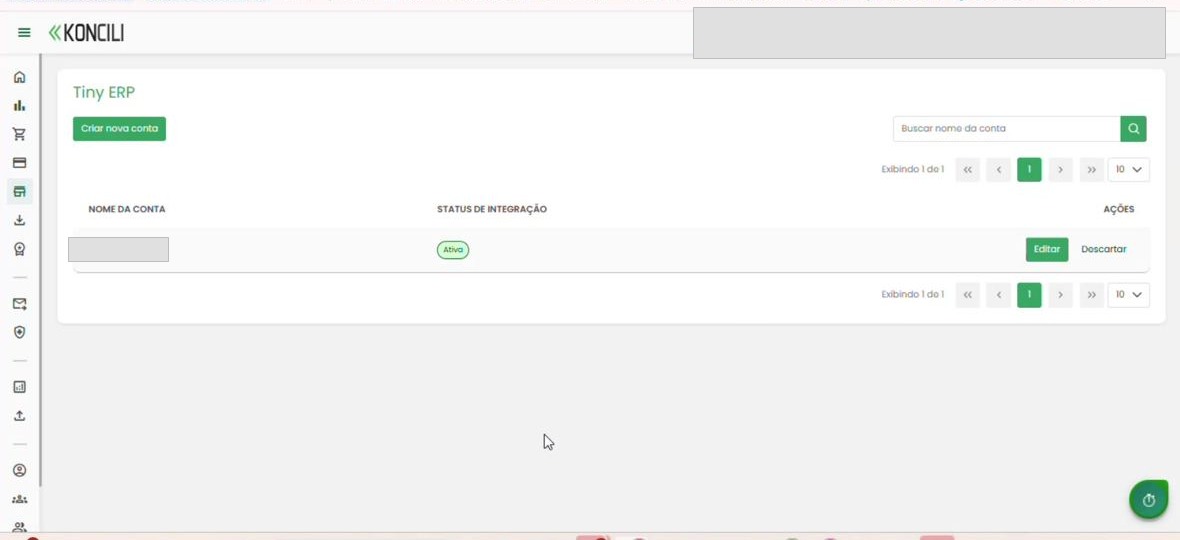
Olist/Tiny ERP account connected in Koncili
Account saved and connected — it now appears in Koncili's Olist/Tiny ERP integration.
Expiration: if the authorization stays unused for 30 days, access expires. In that case, reconnect the account by repeating step 3.